Category Archives: Techniques and Processes 1A

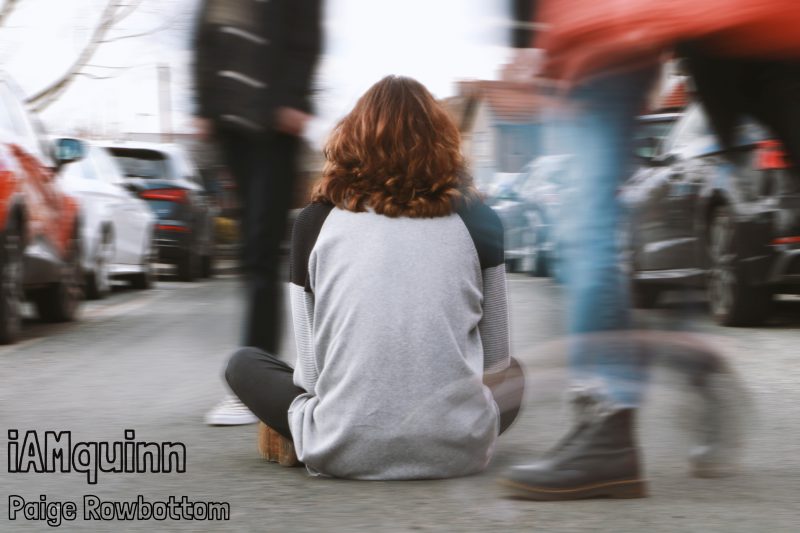
Shutter speed test shoot

What have I done?

During this T & C shoot I decided to attempt to achieve the ‘Milky’ water look associated with sea/landscapes. This involved setting up a tripod and deciding on a shutter speed that captured the rush of the water turning it into a sort of ‘mist’ effect in the photograph.

What have I got from this?

This test shoot allowed me the chance to experiment with different shutter speeds to decide which shutter speed is ideal to create this effect with the water, these pictures were shot at a 5 second shutter speed, which under the light situation at the time was the best shutter speed to use in order to achieve the ‘milky’ water effect. I shot with shutter speeds from 3-6 seconds, however those photographs were unsuccessful and 5 seconds was the correct shutter speed under those conditions.

Whats next?

I want to take these pictures but on a larger scale, with more water and and more movement to achieve the whole of the body of water ‘milky’, this may include finding a different location with a bigger body of water as this location was not ideal and had a slant along with plants and bushes, making it hard to set the tripod up. Also I would like to attempt these pictures again with more natural light available.

T and P proposal draft 1


Paige Rowbottom

Introduction:

For my Techniques and Processes project I have decided to take pictures of my dog. I believe that he is the perfect subject matter for me as I love to take pictures of domesticated animals such as dogs, cats and horses. I think that taking photographs of my dog is very personal and a potential career path that I see for myself in the future. I work very well with animals and as I have such as close relationship with my own pet that this project has the ability to work really well. Also he is the perfect subject matter to test shoot with, as I can explore different techniques and processes such as white balancing, different shutter speeds, lens lengths, apertures and ISOs.

Production methods:

I intend to shoot in a variety of locations both inside and outside, this will allow me to work with different lights sources such as artificial and natural lighting. As dogs can be very fast and active but also very lethargic, this will work well for shutter speed shots in which I can either freeze his motions or use a long exposure to blur the action. One thing that I am under-confident about is using different lens lengths effectively. I have shown that I have the ability to use a zoom lens well with a tight crop and shallow depth of field. One thing I would like to achieve in this project is to use a wide-angle lens with a deep depth of field. I feel like this will challenge me within my project as I only feel comfortable using my 55-300mm lens to achieve tightly cropped shots, regardless of the subject matter. Also I haven’t experimented with different techniques, I have only experimented with aperture and ISO so it will be a new experience for me. In addition, before I started the Photography BA course I had never white balanced a picture before, so I am excited yet worried to attempt to correctly white balance my photos. I feel like taking manual control of the aperture, shutter speed, ISO, white balance and deciding what will compose my final body of work will be a challenge for me as I have always let the camera do a lot of the work for me and make important decisions such as the aperture. And when it comes to deciding my final pictures I am worried because this will be the first brief that I have ever worked from and so the pictures I chose to use might not meet the standards of the brief.

Research requirements:

I believe that research for this brief consists of a lot of experimenting with your own photos, as well as actual research from a variety of sources. I intend to use a mixture of professional websites such as the AOP or BJP but also use sites that explain clearly about how to use different techniques and what they do to your photographs. My knowledge in most areas is lacking, but I intend to do extended research into all the techniques that we have learnt and experimented with. Also I will research specific ways to photograph dogs, such as what light is flattering indoors, what is the most flattering angle/ height to shoot from (e.g from the shoulders up) and what the best shutter speed is to use to freeze the dogs motion. However a lot of this knowledge will come from myself, from experimenting and from test shots.

Target audience/career:

I think that the great thing about animal portraits is that they can appeal to practically anyone, there is no specific section of society or age group that they are targeted at. I would like my pictures to be used either as an advertisement for a dogs home/pet shelter or to be used as part of a wider body of work that could be displayed in an exhibition at a gallery such as the Impressions Gallery or displayed as part of a public art, such as on a billboard. My career aspirations are to take pictures that make people happy, at the minute to me this means either wedding photography, portraits of people and their pets or just pet portraits. This project will help me to decide if pet portraits is something that I am willing to shoot in the future and will help me narrow down what kind of photography career I am looking at. It could even develop into wildlife photography but for now I feel that domesticated animals are what I want to photograph.
Shutter Speed test

What have I done?

These are photos from two different shutter speed test shoots I did, using sparklers and the torch light on an Iphone. The Shutter speeds I used range from 3 seconds to 6 seconds.

What have I got from this?

This test shoot allowed me to experiment with different shutter speeds and showed me which speeds work better for different subject matters, for example a 5 second shutter speed was ideal to capture the light trail of the sparkler, however 4 seconds captured the light from the Iphone better. The shutter speed also depended on the movement of the light, for example to love heart drawn with the light from the Iphone was a quick movement so 5 seconds would have created unwanted light trails that would have distorted the love heart and ruined the picture.

Whats next?

I am going to continue to experiment with shutter speeds on other subjects such as water, I am going to attempt to take a photograph in which moving water (such as from a waterfall) becomes ‘milky’. and perhaps shoot more light trails from phones, using longer shutter speeds to see what the effects are.

ISO test

What have I done?

These are photos from a test shoot I did at 400 ISO. I am unhappy with the results as the photos are too dark, I had to up my ISO to increase the cameras sensitivity to the available light which heightened the amount of noise/grain in the pictures. Also I was unable to change my aperture above f5.6 because my lens is limited to a maximum aperture of f5.6

What have I got from this? 

I may have to turn up my ISO even higher as the amount of available light was limited, my other option is to borrow a camera from stores and use a lens that opens to an aperture of f1.8 to be able to achieve lighter photos. Another option is to lighten the photo in post production.

Whats next?

I will continue to do test shoots, I am going to work at a higher ISO and do the shoot at an earlier time when more natural light is available, I am also going to do a white balance test, an aperture test, a shutter speed test and a lens length test.

Using a Darkroom (and health and safety)

On Tuesday 3rd November we went to Saltaire and experimented with film cameras, using a black and white 35mm Liford Hp5 film with a 400 ISO. ‘Ephemera’ is the buzz word Sally gave us, meaning something that occurs in nature that isn’t permanent. We then developed the negatives we had taken.

I learnt about health and safety in a darkroom (this was my first time using a darkroom) and the risks that come from being with dangerous chemicals in a pitch black room.

Firstly Sally told us that if you are pregnant or have had previous health problems you are unable to even enter a darkroom as the chemicals used in there are dangerous to the infant and your health. She then told us that when using a darkroom safety glasses are to be worn to protect your eyes in case any of the solutions splash upwards and a lab coat is to be worn to protect your clothing as the solutions will stain clothes. Once you enter the darkroom, before you turn the lights off you need to make sure that all the equipment you are going to need is already in front of you to make it easier to find when the room is dark. Also because you are going to be in total darkness you need to make sure that there is nothing on the floor that you may trip over, this includes items such as bags or coats. You then need to check how long you are going to develop your film for, so at 20 degrees for our 35 mm at ISO 400 film we had to develop it for 7.5 minutes. You then need to check the temperature of the dev, 20 degrees is ideal but after others have used the dev, it may be a degree or two warmer or cooler. If this is the case you should alter your time accordingly.

Once the lights are off you can then open your film canister, cut the edge into a straight line (carefully) and wind your film onto your spiral. Then you will put your spiral onto a stick and place it into the Developer, you can either count the time yourself or get somebody else to time for you, every minute you will need to agitate the film simply by moving it up and done 3 times, this is to make sure that the developer covers the entire film to stop any unwanted lines or waves on your pictures. After your time in the dev is up you can then put your the stick with your film on into the Stop Bath for 30 seconds, this is going to stop your pictures from continuing to develop. After 30 seconds you can then take your film out and place it into the fixer, this is going to preserve your negatives and prevent the images from fading, you need to leave the film in the fix for 5 minutes, however after 3 the process is complete enough that you can turn the lights back on. You then leave the film in until the 5 minutes is up the last stage is to wash your film, you need to leave the film to wash for 20 minutes, this basically just gets rid of any of the remaining chemicals on your film. After your 20 minutes is over you then need to dunk your film into the wetting agent to prevent dry marks from appearing on the film. After you’ve done this you need to scrape the excess wetting agent off your film, you can either do this using your hands or using a squeegee. If you do use your hands for this bit or get chemicals on your hands during any part of the process you need to wash your hands afterwards, to prevent irritation of the skin.

Lastly all you need to do is hang your film up with a weight on the end (to prevent ti from curling when it dries) and leave it over night to dry.

Colour/White Balancing

What have I done? 

In these photographs I have been experimenting with different white balancing settings on my camera, as well as using a white card to Pre-set a white balance for particular settings and locations. This allowed me to achieve a ‘neutral’ photo in which white looks white and the colours look the same on the photo as they do to the human eye.

What have I got from this?

White balancing is a useful tool to any photographer, it allows me to attain the correct colours in a picture. This will be useful to me in all aspects of my work, especially in my portrait work as it is very important to make sure that the colour of clothes, hair and skin are photographed correctly. This skill will improve my photographs technique and over time, with practice, will improve and benefit all of my pictures.

What’s next?

I will continue to use white balancing on my photographs, to get into the routine of setting the correct balance as well as practice. Hopefully I will improve my skills and will be able to transfer the skill into all projects I undertake and any photographs that I take.

Visual Communication and lens/camera control

What have I done?

In these photographs I attempted to understand how changing the aperture, shutter speed and ISO settings on the camera can influence the outcome of the photograph and how dark or light the picture will appear. I also attempted to understand ‘Stops’ in order to gain control over the conditions in the photos to attain the correct exposure. Also, I practiced taking portrait pictures and experimenting with angles, distortion and depth of field.

What have I got from this?

This gave me the knowledge of how aperture stops, shutter speed and ISO can effect my photographs, and these skills will be transferable to all other aspects of my photography. This will benefit my technical skills and they will improve over time with practice. Also, taking portrait pictures have helped me to understand how to take a flattering portrait that might not be technically correct but visually pleasing, showing me that although technique is key, at the end of the day photographs are aesthetically pleasing, sometimes in spite of technical flaws.

What’s next?

I will continue to practice with varied apertures, shutter speeds and ISOs, in order to fully understand and therefore profit fro the skills in my photography career. This will benefit me, especially in my preferred subject of people and portrait pictures.

My Photographs

These photographs sum up what kind of pictures that I enjoy taking, all are similar but show off different aspects of my skills and interest areas. Whilst I mostly feel comfortable working with people and animals, occasionally I may find myself drawn to plants or minor details that are not picked up by people walking past. Through my photography, I aim to capture a moment of emotion, which others can look back at and immediately can relate to the emotions portrayed in the photo. This is why my aim at this moment in time is to become a wedding photographer, to capture memories on other peoples days and to bring them joy when they look back at the pictures.